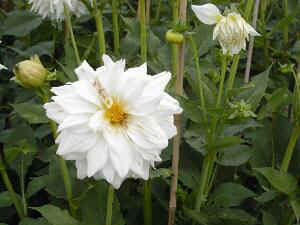
 THE GROWING WORLD OF DAHLIAS
![]()
|
|
|
DAVE'S DAHLIA DIARYDave's Diary describes the activities required throughout the year to grow dahlias. The area where I live is in the midlands within England, and the last frost date is approximately June 1st. The first killing frost is usually around mid to late October. Winter temperatures drop to just below freezing for a few days each winter. If you live in other areas, you will need to adjust the dates of your activities to the last frost and first killing frost in your area. January, February, March, April, May, June, July, August, September, October, November, December, Bottom
JANUARYChecking tubersInspect your tubers to check for excessive drying and for signs of disease and rot. If they are becoming too dry, give them a light spray with tepid water so that they can plump up a little. If there is signs of dampness and rot, cut out the bad area and give a light dusting with sulphur powder to deter further rot. It may be necessary to split the tuber clump to eradicate the rot. If you split them, make sure each portion has a label identifying the variety.
Starting Tubers into growthIf you want to produce several plants from each tuber, this will involve taking cuttings. If you only want one or two plants from a tuber, cuttings are not needed and the growing process can be delayed until late April or early May. In order to get enough cuttings for show worthy plants, I start my tubers into growth at the end of January. I have a small greenhouse (8ft x 6ft) which is heated with a 2Kw fan heater, set to keep the minimum temperature at 45 degrees F. Propagating benches are set up using soil warming cables embedded in sand which is kept moist to allow the warmth to spread all over the bench. Tubers are set in trays with the crown still above the level of the compost, and when the tray is full, it is placed on the bench. When the bench is fully prepared, the tuber trays are watered with warm water so that the warm sand on the bench is not cooled by the water. The trays are checked every few days in case they have dried out. Only water again when needed, do not flood the trays as this will cause the tubers to rot.
Tubers are of two types, field tubers and pot tubers. Field tubers are those that were grown in the ground the previous year and have been dug, dried and stored over winter. They are slower to start into growth than pot tubers but tend to produce far more cuttings. Pot tubers result from growing plants in a restricted environment the previous year, usually in a pot, and at the end of the year, the plants are cut down and the pots lifted and stored on their sides in a frost free location. At starting time, they are removed from the pots and trimmed and then set up. The start into growth far more quickly than field tubers, but don't produce as many cuttings. They only have thin stems, and consequently they store more successfully than field tubers, particularly if the variety is prone to thick stems and fibrous tuber roots.
Preparing the GroundThe ground where my dahlias are grown is quite fine and sandy, so digging can be delayed until January, and humus material is not usually applied at this time as it is likely to leach away in the spring rains.. If your ground contains a proportion of clay , then it should be rough dug from November onwards to allow the winter frosts to work on the soil, improving the nature of the clay soil. Clay soil needs a large amount of humus/compost to be incorporated, again improving the soil structure and helping to provide food for the following year's plants.
January, February, March, April, May, June, July, August, September, October, November, December, Bottom FEBRUARY
Checking tubersContinue checking tubers as in January.
Taking CuttingsBy the end of the month, the tubers should have started into new life, and some shoots will be large enough to allow the first cuttings to be taken.
Shoots that are about 3 to 4 inches long are ready to be taken as cuttings. A very sharp knife or razor blade can be used to take the cutting. Ideally it should be sterilized to prevent transfer of disease from one tuber to another. The cuttings are taken just above the point where they exit from the tuber, and further shoots will then grow from the tuber where the cutting has been removed.
The cutting on the left was taken between leaf nodes, and will be trimmed. The bottom pair of leaves are removed, and the stem cut just below the node. The cutting will then look like the one on the right.
A large leaf area will allow too much transpiration, and the cutting will rapidly flag and may fail. In order to reduce transpiration, the tips of the leaves are pinched off to reduce the area, as above. The cutting is then dipped in hormone rooting compound and placed into a rooting tray in a mixture of 50% silver sand and 50% peat which had been watered previously.
A label is placed beside each cutting, and the propagating tray is placed on the warm bench. If the soil seems to dry excessively, then a light watering with a fine rose on the can is necessary. The cuttings are sprayed with a fine spray twice a day until the tips show a light green colour. This indicates that they have started to root and are ready to move into individual pots (see March). It is a good idea to prepare labels for the various varieties when time permits to avoid having to write many labels when cutting production is in full flow. Labels should be written in a permanent marker ink, not in pencil as pencil can erode from the label due to watering.
Preparing the ground.Digging should be continued during the month when soil conditions allow.
January, February, March, April, May, June, July, August, September, October, November, December, Bottom MARCHTaking CuttingsContinue taking cuttings (see February) Potting UpWhen the cutting is rooted, it is potted up into a 3.5inch (90mm) pot. The compost that I use is a mixture of peat based compost, John Innes No3 (soil based compost), plus horticultural grit to add weight and Perlite to open the structure. I add Chempak fertilizer to increase the feed quantity. I use this mixture as my plants will eventually be placed in the garden soil and I have found that the roots of those potted in pure peat based compost tend to remain in the shape of the pot and not extend through the "harder and stonier" soil. My plant roots will spread through the surrounding soil; and improve the plant's ability to obtain food and water from the soil. The rooted cutting is removed from the rooting tray without disturbing the soil around the roots and potted into the pot. The soil is lightly firmed to leave plenty of air in the soil structure. The label is transferred to the pot, and the pot watered and placed on a greenhouse bench for a couple of weeks until the cutting has become established. Preparing the GroundAt the end of the month, after digging has been completed, I apply a dressing of National Growmore and 6X (concentrated chicken manure). I leave this on the surface for a couple of weeks.
January, February, March, April, May, June, July, August, September, October, November, December, Bottom APRILTaking CuttingsContinue taking cuttings until you have enough of each variety (with a few spares). Potting UpContinue potting up to build your supply of each variety. As the greenhouse fills, the older plants can be moved to a cooler area to commence hardening off. I move mine to cold frames, in trays to keep varieties together. The frames are covered and if frost is forecast, a blanket or fleece is further placed on top of the frame covers to increase the insulation. It is necessary to place slug pellets around and in the frames to avoid damage from these pests which are attracted to the lush growth of the dahlia plants. Do not let the pots dry out, but do not overwater as this will cause the roots to rot in the pots. Preparing the GroundIn the middle of the month, I rotovate the dahlia plot to mix in the dressings of fertilizer applied in March, and to obtain a fine tilth ready to receive the plants. New SeedlingsI grow a number of plants from seed each year to produce my own varieties. The seed is sown in seed compost in trays in the greenhouse on 1st April. The seed is covered by about one eighth of an inch of compost. The first seed will start germinating in about a week.
January, February, March, April, May, June, July, August, September, October, November, December, Bottom MAYTaking CuttingsTake the final cuttings of varieties where you have a shortage. These will flower this year, but may be late. They will provide stock for the next season. Potting UpContinue potting up as the cuttings root. Hardening OffMove the older potted plants to the cold frame to acclimatise to cooler conditions. Remove the frame covers unless frost is forecast when it may be necessary to cover the frames with fleece also. The plants should be fully acclimatised to external conditions by the end of the month. Preparing for plantingDuring the month, take some time to plan exactly where the plants will go in the dahlia beds, marking the plating positions. This can be done with a cane, but great care should be taken if this is done. Each time a plant is put in the ground it will be necessary to bend down beside the cane and there is a risk that the cane could hit you in the eye. The more plants you have, the greater the risk. Plants can be grouped in various ways, for example by type, by colour, by height, by flowering period . I group mine by variety and by type to make subsequent maintenance easier. New SeedlingsThe seedlings that were sown in April will now be growing well, and they can be pricked out into trays or small pots, depending on the number you have. If they were labelled when sown, remember to keep a label with the pricked out plants. Planting TubersIf you do not need a large number of plants, you can plant the tubers early in May. By the time they have come through the ground surface, frost danger should be past. If you want to increase the stock, you can divide the tuber so that each portion has a growing stem and some tuber attached. Tubers will flower more quickly than cuttings. When planting, remember to scatter slug pellets, and it is a good idea to bury a few with the tuber to get rid of those pests which will enjoy a meal of dahlia shoots before they come through the surface of the soil. When planting it is worth adding some general fertilizer to the soil. Fish, Blood and Bone is good for this purpose as it is slow acting and will last all season.
January, February, March, April, May, June, July, August, September, October, November, December, Bottom JUNEPlanting OutIn my area, it is safe to commence planting out on June 1st. Before planting,the plants are sprayed with a good systemic insecticide as this is the last time they will be in such close proximity. The pots are watered and the plants are ready for planting. Following the plan made in May, the plants are transferred to their planting locations. When the soil is removed from the planting hole, a handful of fish, blood and bone fertiliser is mixed with the soil in the planting hole. The plant is removed from its pot and placed in the planting hole, and the soil is drawn round the ball of roots. I leave a saucer shaped depression in the soil around the planting hole. This will permit the morning dew to run down to the stem and roots of the young plant. Slug pellets are placed round each plant, and the label is placed in the ground. This is important as it is needed not only to identify the variety of the plants , but also to act as a guide to the necessary husbandry as the year progresses. After planting, I put in the first support cane for each plant, and if the plant is quite tall, it is loosely tied to the cane to prevent it being blown around and damaged in the wind. The plants are placed about 2 feet (60 cm) apart in each direction to give adequate space for growth. Pompons are placed closer together (approx. 18 inches or 45 cm), while the giants are put slightly further apart (2.5 feet or 75 cms). Pompons and giants are stopped as they are planted, but the remainder are stopped by June 16th. Planting Out SeedlingsSeedlings are planted at the same time as the plants from cuttings, but they do not receive fertiliser. They are planted about 8 inches (20cm) apart each way. This conserves space and the plants will be pulled up as soon as I have decided they do not have adequate credentials for further growing. I usually plant them in blocks of four rows to allow access between the blocks to work on the plants. These plants will not be stopped as I need the flower from the crown bud as quickly as possible to determine their potential. These plants will not have canes associated with them. StoppingI want the plants to bush out and produce a number of stems to increase the number of flowers produced. In order to achieve this, the plants must be stopped. I do this by June 16th. Stopping is the process of removing the central growing tip. This forces the plant to put its energy into the side shoots in the leaf axils and produce a number of stronger stems. General MaintenanceThe plants are now beginning to put on a good amount of growth. Regular hoeing of the ground should be carried out throughout June, but hoeing close to the plant's central stem will have to stop by the end of June otherwise the surface feeding roots will be damaged, affecting the viability of the plant. Two further canes are put in beside each plant, forming a triangular frame around the stem. The first tie around this frame can be put in place as soon as the plants are 18 inches (45cm) high, and a further one added later when the plants reach around 3 feet (90cm). I spray the plants with a systemic insecticide every two weeks throughout the season. I alternate between two insecticides to try to avoid the pests becoming resistant to one particular insecticide
January, February, March, April, May, June, July, August, September, October, November, December, Bottom JULYGeneral MaintenanceContinue to tie up the plants as they reach greater heights. Continue to spray against pests. In order to deter earwigs, fill a washing up liquid bottle (squeezy type) with paraffin. A small amount can then be poured into the open end of canes. Any earwigs present in the cane will rapidly depart from the cane and usually be killed by the fumes from the paraffin. This should be done at the end of the first week of July, and repeated a month later. De-BranchingAfter the stopping process of June, a number of laterals will now be growing on the plant. During the third week of July, the time has arrived to reduce the number of branches to force the plant to concentrate its growing efforts on a few stems. This process is called De-branching. As a general rule, giant flowered varieties should be reduced to 3 stems; large flowered varieties should be reduced to 4 or 5 stems; medium flowered varieties should be reduced to 6 to 8 stems; small flowered varieties should be reduced to 8 to 12 stems. Miniature flowered should not be de-branched. Pompons should not be de-branched, but the growing points of all the stems should be stopped again as in June to encourage yet more branches to ensure the flowers are numerous and inside the size limits. As you learn how specific varieties perform on your soil, you can refine the de-branching process and numbers to ensure the resulting blooms will be of the correct size. (For instance, Polyand, a large decorative has a great liking for my soil and needs to have 8 or 9 branches to ensure the blooms are not too big.) Obviously you cannot add extra branches once they have been removed, but you can err on the cautious side and leave a couple of extra branches on varieties that can be removed should the first blooms be too small. New seedlingsBy this time, the seedling plants will be growing strongly and will be beginning to produce the crown buds. It is worth providing some support to each block of plants to prevent them from falling over and suffering damage.
January, February, March, April, May, June, July, August, September, October, November, December, Bottom AUGUSTGeneral MaintenanceContinue to tie up the plants as they reach greater heights. Continue to spray against pests. In order to deter earwigs, fill a washing up liquid bottle (squeezy type) with paraffin. A small amount can then be poured into the open end of canes. Any earwigs present in the cane will rapidly depart from the cane and usually be killed by the fumes from the paraffin. This should be done at the end of the first week of August. DisbuddingBy now, the terminal buds will be appearing at the tips of the branches. These will have a pair of wing buds present in the axils of the tiny pair of leaves below the buds. Whether the blooms are intended for show , for display or for the house, it is necessary to remove the excess buds to get better quality flowers. Normally, this pair of wing buds would be pinched out to allow the terminal bloom to develop without hindrance from others on the branch. The overall effect is that the plant will send all of its food to the terminal bud, rather than sharing it among several on the same branch. The pinching out process is known as securing the bud. For exhibition purposes, it is also necessary to remove side shoots lower down the branch (starting from the terminal bud), the number being removed depends on the expected size of the bloom. With giants, remove the side shoots from at least three pairs of leaves. This will increase the size of the bloom and prevent the extending side shots from damaging the flower that is required for exhibition. With large, remove the shoots from about three pairs of leaves, while mediums and smalls only need to have them removed from two pairs of leaves. Miniatures are different, in that some varieties tend to be on the big side. Normally I would remove the side shoots from two pairs of leaves, but when I find varieties that are naturally larger, I may only remove from one pair of leaves, and may have to do this much nearer the show date to prevent blooms becoming too big to be shown.Most pompons are not disbudded as they often get too big if restricted.
Timing Blooms for exhibitionFor exhibition purposes, the disbudding process needs to be slightly different, as factors other than just a high quality bloom come into play. The major other factor here is timing. It is no good having perfect blooms a week before or a week after the targeted show! The three buds at the end of the stem will develop at different rates. The wing bud with no extra leaf will produce a bloom approximately five days after the terminal bud, while the one with smaller leaves will be a further five days behind the first wing bud. These days are only approximate and will be more or less depending on temperature and climate. Once the terminal bud is about the size of a small pea, a rough guide to flowering time can be used. In the case of giants, it is about 35 days to the bloom, with large flowered about 30 days, mediums are about 25 days, and small about 20 days. Miniatures are around 18 days and poms around 15 days. With these guides in mind, the process of securing the bud needs to be modified. For example, if you have a medium flowered variety, and your show is a month away, it is better to remove the terminal bud and the second wing bud, leaving the first wing bud which should then produce a show quality bloom in about 30 days. Thus it is possible to delay blooming to a degree, but I know of no process that will bring the blooming date forward. Most exhibitors will attend a series of shows over a period of three to four weeks. In the UK, these normally take place between late August and late September, so exhibitors will target securing the buds for dates over this period. Obviously, not every flower will be in an ideal state on the show day, but there is a chance that several will be there when needed. In order to achieve this, disbudding and securing buds must be done very regularly over the August and September period. As a further complication for exhibitors, some varieties have a very short foot stalk, and naturally produce longer stems if they are grown on one of the side buds, and some others produce better quality blooms from the side buds. In my garden, Charlie Two and Hamari Gold perform better on the side buds, but this may not be the general rule for everyone, each grower has to find what variety suits their ground and how best to treat it.
Improving blooms for exhibitionIn order to get better blooms to a show, it is worth spending some time improving them to get the best possible results.
Insect damage will destroy a bloom for show purposes, so it is worth trying to avoid this. Buds showing colour can no longer be sprayed without being damaged, so alternative methods have to be found to keep insects at bay. I have tried two different methods which have proved satisfactory, but not perfect as some insects will fly onto the bloom and cannot easily be stopped. As the stem holding the bud extends, many exhibitors smear some Vaseline (petroleum jelly) over about one inch of stem about ten inches below the bud. The smell will prevent many insects from going to the bud, and also the sticky nature prevents climbing insects from crawling up the stem. Major problem with this technique is that you have to remember to wipe the jelly from the stem when cutting for show, as the jelly always seems to be in the ideal place for holding the stem! An alternative technique which is less messy is to obtain some pipe cleaners and leave them in a sealed box containing camphor or moth balls for a few weeks so that they absorb the smell of the camphor. When the stems are extending, a pipe cleaner can be attached to the stem by twisting it around the stem. The camphor smell deters the insects.
Show blooms need to be at the correct angle to the stem,and should all look the same way in the vase. Many varieties do not have blooms that sit at the correct angle, which should be not less than 45degrees. My preference is for big blooms to sit on the top of the stem as this allows them to develop as spheres more adequately than those at say 60 degrees. Gravity can affect blooms at angles, and the petals on the bottom may be longer than the petals on the top, (this is known as bearding). The bigger the bloom, the less likely the stem will hold it perfectly as it develops, so the plants needs some help. Split canes or thin dowel rods can be used for this purpose. A piece of cotton wool or a small piece of pipe lagging should be attached to the top of the dowel, making what is known as a neck-stretcher.Once the bud has been secured, the stem will lengthen each day until it begins to harden. While the stem is lengthening, the bud angle can be improved with the neck-stretcher. This is attached to the stem with two or three twist ties. (These should be paper covered, not plastic covered to avoid damage to the developing stem) The cotton wool/lagging should be positioned under the chin of the bud, slightly pushing the chin upward. This will eventually cause the bud to sit at a better angle. However the stem is continuing to extend, so the neck stretcher must be pushed up a little each day to keep up with the growth. Once the stem stops elongating, the neck stretcher can be left in place to provide extra support to the stem. Normally, I would not use a neck stretcher on any variety that is less than a medium.
Some varieties have stems that are soft and not always able to hold the bloom as well as they should. These varieties should be given a liquid feed of high potash fertilizer to strengthen the stems. this has the added advantage that it improves the colour of the blooms.
New seedlingsBy this time, the seedling plants will be starting to flower. Work on selection now starts. It is not worth expending time and effort on those that are not going to be an improvement on existing varieties unless they have some totally different characteristic that is worth keeping in the breeding line. I normally grow about a thousand plants from seed each year, and I only expect a dozen to be worth trying for a second year. I do not wish to have to keep deciding if I want to retain a specific seedling, so as soon as I have decided not to keep it, I pull it up. This also provides more space for its neighbours. Having removed the seedling to the compost heap, this helps makes the other seedlings more visible. If you don't remove them immediately. there is a chance that a good one would be lost in the sea of colour that the seedlings create. Many of the early flowering seedlings will be single flowered, and this characteristic is dominant over double flowered, so it is worth removing these quickly before the bees find the pollen and spread it over the double flowered varieties. So, how do I select what to keep and what to remove. The easiest way is to find those that should be removed, and once you have decided, remove it straight away, otherwise you will have to make the same decisions again the following day, and the day after that! If a single flower is produced I would normally remove it, but wait until I am sure it is not a collerette. If the flower is double, is the stem strong enough to hold the head up? If not, it is removed as it is unlikely this plant will ever produce blooms that sit properly on the stem. Is the form adequate, does it have enough rows of petals. If the shape is poor or the petals are sparse, it has to go. What about colour, is it a vibrant colour or non-descript. If the latter, then it should go. Once I have decided to retain a seedling for a second year. I label the plant and tie an individual cane to support the plant. The labelling system is on which each raiser does in their own way, but it is important that it helps you remember the flower. My technique is to label with the year, the classification and the colour. If I have more than one of the same colour and type, I add an extra number at the end. I try to take a photograph of the bloom to act as a further reminder. So for example I may have a label that says "03 9e red" which would represent a red miniature cactus in 2003. I don't give names until at least the second year. Everyone who raises seedlings will consider their new flowers as swans, when in reality, the vast majority are geese. If you have any doubts, get a VERY good friend to look over your flowers to decide what they consider as possible swans. Bear in mind that any you eventually keep will bear your name. Do you want your name attached to that particular flower, would you be proud to say it is yours. In my early days of raising seedlings, I was lucky enough to produce Amgard Coronet (the logo on dahliaworld). The advice from my mentors was "You have produced a standard, do not fall below it". I have lived by that advice and rejected many seedlings that others would have retained. History shows that these lesser varieties do not stand the test of time.
Now is the time to start preparing to get the seed for next year..Not every variety will produce seed as several seem to be sterile. Find varieties that have characteristics you like, and when the flowers are starting to go over, the petals should be removed to leave the open centre showing the pollen. The bees will find these and pollination will occur. Gradually the flower will develop into a conical seed head. This can be removed at the end of September and the seeds removed during the winter. Do not leave too many seed heads on a plant as this will weaken the resultant tuber, and also prevent the plants from producing more flowers later in the season.
Dead HeadingThis on-going process starts when the first flowers have gone over. In order to keep the plants producing flowers up to the first frosts, spent blooms must be removed, to encourage more growth and later buds and flowers. Remove dead flowers and their stems down to the level of the stem where new side shoots are appearing.
Cutting BloomsOnce you have flowers, you can start cutting blooms for the house. Some varieties are more suitable for this purpose than others. Very few people have vases or locations in the house that can take giant and large flowered blooms. I like to have waterlily, pompon and miniature flowered blooms in the house. Some smalls and mediums can also look good in the right locations. I find the waterlily dahlias last best when cut, but it is necessary to change the water very regularly to avoid the scent of dahlias that no-one likes! When cutting, cut the stem at an angle. Dahlia stems are hollow, so will fill with air when the looms are cut. This will cause them to die more quickly, so a process known as "bleeding the air" should be done. The end of the stem should be held under water, and a small knife used to make an incision into the stem. This will allow air bubbles to be released from the stem, and the space to be filled with water. I like to do this in cold water as I believe it extends the life of the cut flower. Others believe the stem ends should be plunged into boiling water to kill off the bacteria that will cause rot of the stems in water. This is a theory I have never tested.
January, February, March, April, May, June, July, August, September, October, November, December, Bottom SEPTEMBERGeneral MaintenanceContinue tying in the plants to keep them tidy. Be watchful for pests, spraying the foliage (not the flowers) to control as necessary. Now the flowers are blooming, it is time to check those labels and ensure they are correct. Continue disbudding Continue dead heading
Stock SelectionOnce the plants are flowering, you can select the ones to propagate from for next year. Mark the ones that are growing most strongly, look the healthiest and bear the best quality blooms as the prime ones for next year. Also mark any that do not look healthy to be ignored at the end of the season. New Variety SelectionNow is the time to look around the shows, trial grounds and other people's gardens to find the varieties that would enhance your collection for the next year. Make notes of the names and suppliers. Check the heights to see if they would fit in your location, and see if the colour is one that you would like. Exhibiting DahliaMake sure you have entered the shows in good time, and take your blooms along to compete (not necessarily to win!). The shows are made by the losers, not just the winners. The public attending the shows want to see as many varied flowers as possible, and those intending exhibitors who decide to opt out because they would not win are not helping the cause of the flower, Exhibiting is a large topic in its own right and is covered on its own pages (to be constructed).
New SeedlingsContinue to select seedlings to be retained for a second year. and rejecting those that are not acceptable. Continue to save a few flowers to produce seed heads for next year. At the end of the month, cut the seed heads with some stem so they can be tied together and take them to the greenhouse to dry. I have a friend who puts his seed heads in the airing cupboard where they dry very well and he has less losses due to fungal infections.
January, February, March, April, May, June, July, August, September, October, November, December, Bottom OCTOBERGeneral MaintenanceContinue to keep the plot tidy and ensure plants are labelled. Continue dead heading to extend the flowering season. Prepare an area in the greenhouse for when the tubers are lifted. Basically we are waiting for the first frost to blacken the foliage. If this does not happen by the last week of the month, I will start to lift the tubers regardless, as once the frost and rains come, it may take too long to get the tubers out of the ground for them to survive. Lifting tubersBefore attempting to lift the tuber, I first remove the ties and the canes. Whether the label is attached to the cane or is in the ground beside the plant, I move it to a safe place ready to attach to the tuber when lifted. Next, using long arm secateurs, I cut the top off the plant about a foot above the ground. This leaves a handle to hold the tuber when lifting. My soil is quite light, so I can lift the tubers with a fork, but on heavy soils it may be necessary to use a spade. I move the fork all round the plant, leaving space for the tuber and then lift the tuber from the ground. It does not matter if the swollen tubers are cut or broken, but the point at which they join the stem (the crown) must stay intact. Once the tuber is out of the ground, I use a wooden mallet to tap the cut stem and effectively remove the majority of the soil. The label is than fastened to the stem which is cut off about six inches above the crown. The tuber can then be stored upside down in a frost free place to dry off. It should be upside down as the hollow stems often contain high volumes of water. Many people dip their tubers in a bucket of liquid fungicide at this point, but I don't normally do this. I prefer to dust my tubers with sulphur powder, especially if the fleshy tubers are split or cut.
Preparing tubers for storageOnce the tuber clump has dried out sufficiently, cut off the tiny fibrous roots with a sharp pair of secateurs. Tighten the wire attaching the label as the stem will have shrunk a little as it dries. The tuber can then be stored in a box in a frost free spot for the winter.
New SeedsCut the remainder of the seed heads before the first frost and dry them. If you are scientific with your crossing, labels should be attached to each head so you know the parentage. I let the bees do the work, so have no need to label the heads, but sometimes I label them with the variety of the female parent. When the heads have dried, they will have opened slightly, and the head can then be broken up and the seed removed in the longer evening. The seed should be stored in air tight jars, or in envelopes with any necessary labelling. It should be stored in a dry place until it is needed next April.
January, February, March, April, May, June, July, August, September, October, November, December, Bottom NOVEMBERGeneral MaintenanceNow the tubers are lifted and in storage, they must be checked regularly for signs of rot or fungus. If rot is seen, it should be cut out and the infected area treated with sulphur dust. If they appear shrivelled and too dry, spray them lightly with tepid water to plump them up again. Continue to extract seeds from seed heads and store them as in October Now the dahlia plot is clear, Winter digging can be done, incorporating some good manure to provide nourishment for next year's plants. Leave the soil in lumps to allow the frosts to work on it. Fun TimeNow is the time to while away the winter nights and dream of next years flowers. Plan what you intend growing, how many and where. Sort out what new varieties you need and what stock needs replacing and get your orders in early. The nurseries like to get the tubers to you in time for January starting, and also need to have some idea of how many plants they need to propagate the following year.
January, February, March, April, May, June, July, August, September, October, November, December, Bottom DECEMBERGeneral MaintenanceCheck the tubers in storage as in November Continue with winter digging when the conditions allow. Continue to extract seeds and store them as in October
January, February, March, April, May, June, July, August, September, October, November, December, Bottom BottomLast updated 25 January, 2005 |
For problems or questions regarding this web contact
[ProjectEmail].
|